
3D Printed Investment Casting Patterns & Burnout
3D printed investment casting patterns are sacrificial resin patterns that take the place of injected wax. They're coated in ceramic shell or set in investment, burned out in a furnace, and the empty cavity is filled with metal. They suit prototypes, one-off parts and low volumes where a wax injection die isn't justified. Whether they work depends less on print resolution than on burnout: the resin has to be castable, the pattern has to be designed to limit expansion, and every pattern has to be drained, dried and cured correctly.
That holds for vat photopolymer patterns (SLA, DLP and LCD masked exposure) in both ceramic shell casting and the flask investment used by jewelry and dental labs. Alloys, shell systems and furnace practice vary from foundry to foundry, so treat what follows as a starting point to confirm on your own parts rather than a set of universal settings.
Where a printed pattern fits, and where wax still makes more sense
In conventional investment casting, the expensive and slow part of the pattern is the metal die used to inject wax. A printed pattern removes the die. The CAD file goes straight to the printer, and a design change means a new file instead of die rework.
Printing can enter the casting workflow in two different ways. A printed master is used to make a silicone or other soft mold, which then produces wax copies; the print never goes into the furnace. That route is covered in our guide to 3D printed master patterns for metal casting. This article is about the direct route, where each printed pattern is invested and destroyed.
| Decision factor | Direct printed resin pattern | Injected wax pattern |
|---|---|---|
| Tooling | None. The next design revision is the next print. | Requires a die; changes mean die modification or a new die. |
| Typical quantity | One-offs, prototypes, bridge production, frequent design changes. | Repeat production where the die cost is spread over many patterns. |
| Geometry | Internal passages and fine features without parting lines or core pulls; support placement still matters. | Limited by die draw, parting lines, cores and pulls. |
| Removal from the mold | Burns out in a furnace. The cured resin expands and decomposes rather than melting. | Melts and drains, often in a steam autoclave before firing. |
| Main process risks | Shell cracking from expansion, ash or residue, trapped liquid, moisture uptake. | Wax shrinkage and distortion, die wear, handling damage. |
| Cost per pattern | Resin, print time and post-processing labor for every piece. | Low once the die exists. |
Neither column wins outright. A part that's still changing, or that will only ever be cast a few times, usually favors printing. A stable part cast every week usually justifies wax tooling eventually, and a printed pattern can bridge the gap while the die is being made.
The furnace is where resin patterns behave differently from wax
Wax melts at a low temperature, so most of it drains out before the shell takes much load (wax expansion can still crack shells, which is why foundries dewax quickly). Cured photopolymer is a crosslinked thermoset. It doesn't melt. As it heats, it expands, softens, decomposes and finally burns. Research from Loughborough University on large vat-photopolymer casting patterns treats this thermal expansion as the central problem and notes that such patterns go through furnace burnout instead of autoclave dewaxing.
Three failure mechanisms follow from that:
Expansion against the shell. If the pattern pushes outward before it softens enough to give way, the shell cracks. Metal then runs into the crack and the casting comes out with fins, or the shell fails completely during the pour.
Incomplete combustion. Residue left in the cavity shows up as inclusions or pitted surfaces. Enough time at temperature and enough air in the furnace both matter.
Trapped liquid. Wash solvent or uncured resin sealed inside a pattern turns to vapor and builds pressure from the inside.
Most castable resin suppliers specify a furnace burnout cycle and advise against steam autoclave dewaxing for printed patterns. Use the cycle written for that resin and that shell or investment. If the foundry normally runs a cycle tuned for wax, run test shells before putting printed patterns into a production heat. Jewelry and dental casters working with flask investment should also check whether the resin calls for a particular investment type or a slower ramp; some castable resins are sensitive to both.
Design the pattern for burnout, not only for printing
Hollow larger patterns and support them inside
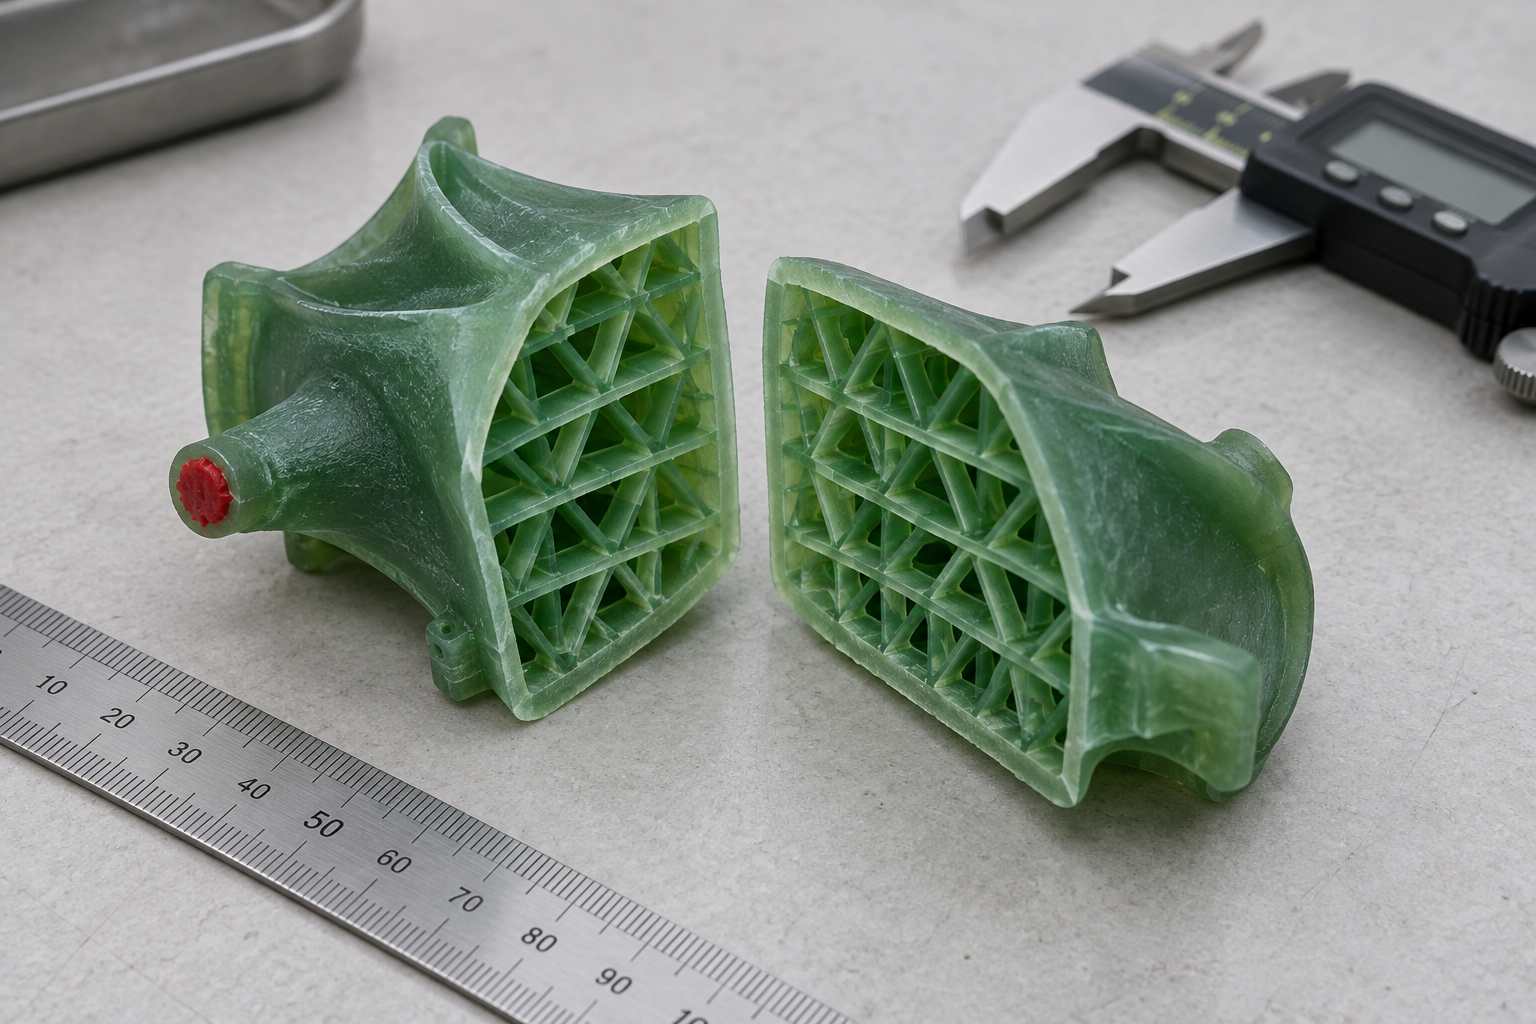
For medium and large patterns, a solid resin body is the biggest source of expansion force and residue. The established answer is a thin outer skin supported by an internal lattice. As the resin softens, the thin skin and lattice tend to buckle inward instead of pushing the shell outward, and there's far less polymer to burn. The hollow, lattice-supported SL build style known as QuickCast is the best-known example.
The trade-off is handling strength. The skin has to survive slurry dipping, stuccoing and any sanding without denting or cracking. Skin thickness and lattice spacing depend on the resin, the printer and the pattern size, so they're worth proving on a test piece before committing a real part.
Small jewelry and dental patterns are usually printed solid because their mass is small. Even then, a heavy section joined to thin features deserves attention, since that's where expansion stress concentrates.
Plan drain and vent holes, then seal them
A hollow pattern needs holes to drain liquid resin during printing and to flush wash solvent afterwards. Put them at the low and high points of the build orientation, at the sprue attachment, or on surfaces that will be machined after casting. Before the pattern is shelled, seal every hole with wax or a small amount of UV-cured resin and check for leaks. Slurry that gets inside through an open hole becomes a ceramic core inside the casting.
Put supports and layer steps where they can be dressed
Every support witness and every stair-step on a shallow slope transfers faithfully into metal. Orient the pattern so that critical cosmetic or sealing surfaces aren't on the support side, and place supports on faces that will be machined or are easy to finish. Agree the gate and sprue position with the foundry before printing. Some teams print a gate stub as part of the pattern so the joint to the wax tree is clean and repeatable.
Castable resin is a different material, not a print setting
General-purpose rigid and model resins aren't formulated to burn out cleanly. They can leave more residue and behave less predictably in the furnace, so an occasional good casting from one doesn't make it a process. Castable resins are formulated for burnout, typically for low ash and controlled thermal behavior. A wax-like color or a "wax" product name doesn't make a resin castable either; the data sheet has to say so.
Before qualifying a castable resin, ask the supplier for:
ash content, and how it was measured;
the recommended burnout cycle: ramp rates, holds, peak temperature and furnace atmosphere;
compatible shell or investment systems;
post-cure instructions specific to casting use;
storage conditions and shelf life for both liquid resin and printed patterns.
YIDIMU's Casting Model Resin is a green translucent resin positioned for dental casting models and castable patterns, formulated for low ash, low residue, low shrinkage and clean burnout. Like any castable resin, it should be validated with the investment and burnout cycle it will actually see in production.
Post-processing decides whether the shell survives
Many shell failures blamed on the resin start at the wash station. A practical sequence:
Wash thoroughly. For hollow patterns, flush the lattice and blow it clear. Residual solvent or resin inside is the vapor source described above.
Dry completely before curing. Solvent left in the surface affects how the pattern cures; see when resin prints are dry enough to cure.
Post-cure to the resin's own instructions. An under-cured pattern can stay tacky and distort when handled. A general-purpose curing time from another resin isn't a reference.
Remove supports and dress witness marks. Whatever is left on the surface is cast into the metal.
Store patterns dry and invest them within a consistent window. Photopolymers absorb water to very different degrees depending on formulation, and moisture changes both dimensions and furnace behavior.
Inspect and measure before shelling. Once the pattern is invested, nobody can measure it again.
Dimensional accuracy is a chain, not a printer number
The dimension of the finished casting is the sum of several separate steps: the CAD model, the printed pattern's deviation, any change during post-cure, the behavior of the shell or investment, and the shrinkage of the metal as it solidifies. The foundry compensates for the last of these with its pattern allowance, which depends on the alloy and the geometry.
XY pixel size describes how finely the printer images each layer. It doesn't establish the dimensional accuracy of the printed pattern, and it says even less about the tolerance of the casting. To find out where an error comes from, measure the printed patterns after post-cure, by scanning or CMM, separately from the castings. Without that split, there's no way to tell whether to change the print orientation and compensation or the foundry allowance. A structured first article inspection for resin printed parts gives that pattern-side baseline. Measuring several patterns from different builds and platform positions also shows whether the result is repeatable or just one good print.
How to validate a printed pattern route before production
Choose a representative pattern that includes the thickest section, the thinnest wall, the most critical surface and any internal passage.
Agree acceptance criteria with the foundry: dimensions, surface finish, allowed defects and any inspection the casting will go through.
Print several patterns across more than one build and at different platform positions.
Measure the patterns after post-cure and record the results.
Shell or invest them and burn them out with the foundry's normal production materials and furnace, not a cycle that only exists for the trial.
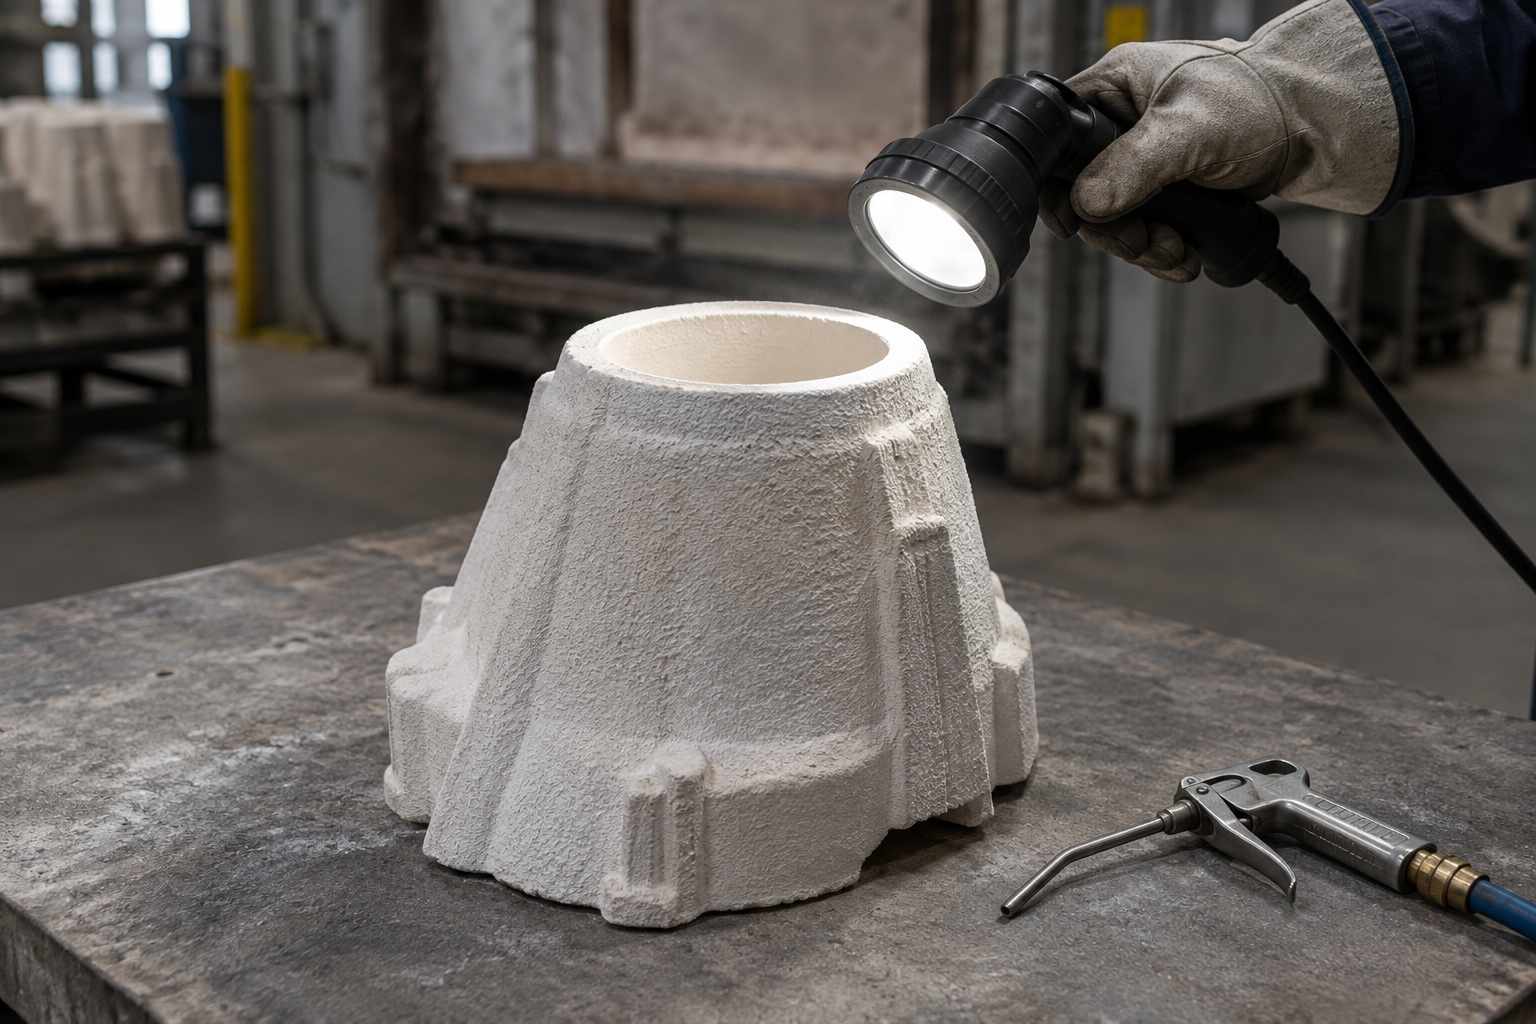
Inspect the empty shells for cracks, fin paths and residue, and blow out any ash.
Cast, then inspect the metal for dimensions, surface, inclusions and porosity.
Repeat the run. If the results hold, freeze the print parameters, resin handling, post-processing steps and storage window as a written procedure.
Choosing a printer for castable patterns
Pattern size and the finest feature that has to survive into metal set the requirements. For jewelry, dental and other small precision patterns, the Eternal D1 is a 10.1-inch 14K LCD masked-exposure printer positioned for dental and jewelry work, including lost-wax casting patterns. Its 14K figure describes display resolution; what matters for casting is the measured pattern and the casting that comes out of the shell.
For larger industrial patterns, build area is only the first filter. Whether a hollowed pattern of that size burns out without cracking the shell depends on the resin, the design and the foundry's cycle, and it has to be tested. When several printers are being compared, send the same pattern file to each and judge the castings, not just the prints.
Evaluating a printed pattern route? Send YIDIMU a representative CAD pattern along with the alloy, your shell or investment system and your burnout practice. The useful result is a printed pattern you can measure and run through your own furnace before deciding on equipment. Request a pattern evaluation.