
DIRECT ANSWER
How do you know when a resin print is dry enough to cure?
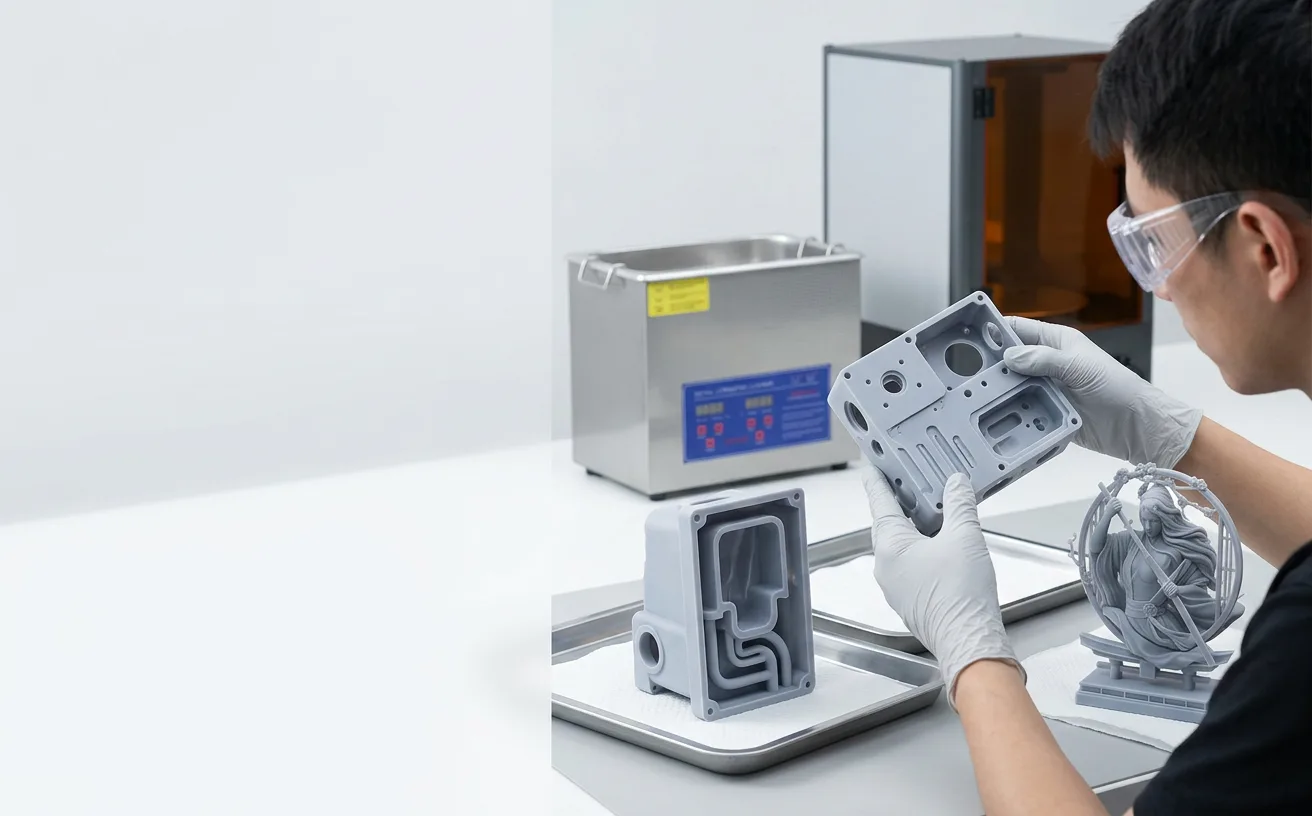
Do not judge dryness by the clock alone. After the print has been washed according to the resin-specific procedure, inspect it under good lighting. The surface should not show a wet solvent film, beads, pooling or visibly damp patches. Pay special attention to drain holes, deep recesses, lattice cells, support junctions and hollow internal features. If cleaning liquid can still move, collect or reappear when the part is tilted, the part is not ready for UV post-curing. Once the wash liquid has fully evaporated, proceed using the curing wavelength, time and temperature specified for that resin and workflow.
KEY TAKEAWAYS
The practical rules that matter
- “Dry” means the cleaning liquid has evaporated after adequate washing; it does not mean the resin print is already fully cured.
- A glossy or sticky surface can indicate incomplete washing, trapped liquid or uncured surface resin, so dryness and cleaning quality must be considered together.
- Hollow parts, lattices and deep channels usually need more careful drainage and inspection than open, simple geometries.
- IPA, ethanol, water or another approved wash medium can behave differently. Use only the cleaning process allowed for the specific resin.
- Longer drying is not a substitute for poor washing, and longer UV exposure is not a universal fix for residual contamination.
- For repeat production, define a documented wash–dry–cure check rather than relying on operator intuition alone.
WHY DRYING MATTERS
Why residual wash liquid should be removed before UV post-curing
Fresh resin prints normally leave the printer with uncured photopolymer on their surfaces. Washing removes that residue. Drying then removes the cleaning liquid used during washing so the part enters UV post-curing in a controlled and repeatable condition.
If a print goes into the curing chamber while wash liquid remains on the surface or inside features, the result can be harder to control. Depending on the resin, cleaner and geometry, operators may see cloudy areas, stains, uneven surface appearance, tacky zones or inconsistent post-cure behavior. The correct response is not to invent a longer UV cycle; it is to verify the cleaning, drainage and drying stages first.
YIDIMU’s current resin-printing workflow places washing, complete drying and UV post-curing as separate steps. The broader process is described in the resin 3D printing process guide and the practical guide to how resin 3D printing works.
WORKSHOP CHECK
When are resin prints dry enough to cure? Use a five-point inspection
- Check broad surfaces under bright, neutral light. Look for a continuous wet sheen, streaks, beads or patches that appear darker or glossier than the surrounding area. A uniformly dry surface is easier to judge before supports or complex shadows hide details.
- Tilt the part slowly. Watch holes, cavities, pockets and channels. If liquid runs, gathers at an edge or reappears from an internal feature, continue draining and drying. Hollow parts require particular attention because liquid can remain out of sight.
- Inspect support intersections and downward-facing geometry. These areas often trap wash fluid because closely spaced supports, cups and narrow gaps restrict drainage and airflow.
- Check the cleaning result separately from the drying result. A part can be physically dry but still carry uncured resin if the wash was incomplete. If the surface remains oily, smeared or persistently sticky, review the wash stage rather than assuming more drying will solve it.
- Confirm the material-specific process before curing. The correct cleaner, drying method, UV wavelength, curing duration and temperature can differ by resin. Use the current TDS, SDS, IFU or other formal technical document for the material in use.
PROCESS VARIABLES
Why there is no universal resin-print drying time
Searches for a single number—five minutes, ten minutes or thirty minutes—are understandable, but the number is only meaningful when tied to a specific resin, cleaning medium, part geometry and environmental condition. Published resin workflows from major manufacturers use different drying recommendations for different materials, which is exactly why a generic time should not be converted into a YIDIMU product promise.
| Factor | Why it changes drying | What to inspect |
|---|---|---|
| Cleaning liquid | Different approved cleaners evaporate or drain differently. | Use the resin-specific washing instructions; do not substitute solvents without validation. |
| Part geometry | Pockets, holes, lattices and channels hold liquid longer than open surfaces. | Tilt, rotate and inspect hidden retention areas before curing. |
| Wall thickness and mass | Large, thick or thermally massive parts may dry differently from thin shells. | Check both outer surfaces and any enclosed or semi-enclosed features. |
| Air movement | Controlled airflow can accelerate evaporation when compatible with the documented workflow. | Avoid uncontrolled processes that spread contaminated liquid or dust onto the part. |
| Ambient temperature and humidity | Evaporation conditions change with the environment. | Keep production conditions reasonably stable when repeatability matters. |
| Wash quality | Dirty or resin-loaded wash liquid can leave residue that looks like a drying problem. | Evaluate cleaner condition and whether a second-stage wash is required by the process. |
GEOMETRY-SPECIFIC RISKS
Flat parts, hollow parts and flexible lattices do not dry the same way
Open industrial prototypes
Simple housings, covers and open engineering models are relatively easy to inspect. The main risks are liquid retained around supports, texturing, embossed details, ribs and downward-facing surfaces. Place the part so gravity helps drainage and inspect the lowest points before moving it into the curing chamber.
Hollow parts and internal channels
Hollow geometry needs a complete drainage strategy. Cleaning liquid must be able to enter, flush the internal space and leave it again. If a cavity is difficult to inspect, use a validated process that confirms drainage and drying before the part is sealed, assembled or post-cured. Trapped liquid should never be treated as acceptable simply because the exterior looks dry.
Flexible and elastomer lattices
Lattice structures contain many small cells and intersections, which increases the number of locations where cleaning liquid can remain. They can also deform if handled aggressively. For these parts, the wash, drain, dry and cure sequence should be tested on representative geometry using the actual flexible material and the intended inspection method.
Dental models and detailed surfaces
Dental models often combine fine grooves, sockets, support marks and fit-critical surfaces. Drying should not damage or contaminate those areas. For application-specific dental resins, use the exact post-processing instructions associated with that resin rather than transferring a workflow from a general model material.
TROUBLESHOOTING
What if the resin print is dry but still sticky?
A dry surface can still be tacky. That usually points to a different process question: Was uncured resin fully removed? Was the cleaner sufficiently clean? Is the material compatible with the selected wash method? Has the part received the required post-cure? Is there an oxygen-inhibited or formulation-specific surface effect documented for that resin?
Do not automatically compensate by increasing UV exposure. Excessive or unsuitable curing can change color, brittleness, flexibility, dimensional behavior or other material characteristics. Instead, isolate the step that failed: printing, washing, drying or post-curing. YIDIMU’s troubleshooting section and current material documentation should be used together with the actual resin batch and process record.
Safety boundary
Uncured photopolymer resin and contaminated cleaning liquid require controlled handling. Use suitable personal protective equipment, ventilation and waste procedures from the applicable SDS and workplace rules. Do not pour uncured resin or contaminated wash liquid into normal drains.
PROCESS CONTROL
How to make drying repeatable in a production workflow
For one-off prototypes, an experienced operator may be able to recognize a dry part visually. For repeated production, the better approach is to define a standard acceptance check. The objective is not to force every resin into the same drying time; it is to make the decision criteria consistent.
- Record the resin and batch: identify the material, printer, build and relevant technical document revision.
- Define the wash method: cleaner type, wash sequence and any resin-specific requirements must be controlled.
- Define drainage orientation: specify how hollow features, channels and support-dense surfaces are positioned after washing.
- Define a dryness check: no visible film, no pooling, no liquid release when tilted, and no known hidden retention point left unchecked.
- Define the post-cure: use the documented wavelength, time, temperature and part arrangement for the material and application.
- Inspect after cure: assess surface condition, dimensions, fit, appearance and any application-specific performance requirement.
RELEVANT YIDIMU SYSTEMS
Post-curing equipment and materials should be evaluated as one workflow
YDM-UV-350 UV Curing Box
YIDIMU currently lists the YDM-UV-350 as a dedicated post-curing box for light-cured resin printed models. Curing conditions still need to match the resin, model geometry and application rather than using the chamber’s maximum timer range as a universal setting.
View the YDM-UV-350 curing box →Photopolymer Resin Selection
Different resin families can require different cleaning and curing procedures. Choose the resin for the application first, then build the washing, complete-drying and UV post-curing process around the applicable technical documentation.
View YIDIMU resin materials →PRACTICAL EVALUATION CHECKLIST
What to document before validating a wash–dry–cure process
Use representative parts rather than a generic test coupon alone when the project includes fit, texture, internal channels, flexible lattices or other geometry-dependent requirements.
| Project item | Information to capture |
|---|---|
| Part size | Overall dimensions, wall thickness and large thermal masses. |
| Intended use | Appearance review, assembly check, functional test, dental model, flexible part or other defined task. |
| Critical geometry | Holes, channels, blind pockets, lattices, textures, thin features and support-sensitive surfaces. |
| Material behavior | Rigid, flexible, model, high-temperature, dental or other resin category plus the current technical document. |
| Quantity | One-off sample, repeated batch or multi-part build requiring consistent post-processing. |
| Surface requirement | Visible faces, cosmetic regions, coating areas and surfaces where residue would be unacceptable. |
| Fit and tolerance | Mating surfaces, holes, slots and interfaces that must be measured after the full post-cure process. |
| Post-processing | Wash medium, drainage method, complete-drying acceptance check, support sequence and UV cure conditions. |
| Inspection method | Visual check, dimensional measurement, assembly trial or application-specific test. |
LIMITATIONS & VALIDATION
A drying rule cannot replace representative part testing
The correct drying and curing workflow depends on more than the printer model. Material formulation, part color, geometry, wall thickness, support layout, cleaning method, environmental conditions, curing wavelength, temperature and final use all influence the process. A specification table or generic internet time cannot prove that a particular part is ready for production.
Before scaling a process, validate representative parts with the actual printer, resin, wash medium and curing equipment. Measure what matters for the project—surface quality, fit, dimensions, flexibility, strength, appearance or another defined requirement—and keep the process settings linked to that result.
FAQ
Common questions about drying resin prints before curing
Can I UV cure a resin print while it is still wet with IPA?
It is better to complete the documented drying step first. Residual IPA or other wash liquid can interfere with a controlled post-processing workflow and may contribute to surface defects. Confirm that exposed and hidden areas are dry before UV post-curing.
How long should a resin print air dry?
There is no universal time. Some resin manufacturers publish material-specific minimums, but those values apply to their own resin and validated process. For YIDIMU workflows, follow the current material documentation and confirm actual dryness by inspection rather than transferring a number from an unrelated resin.
Is a sticky resin print always still wet?
No. Stickiness may come from incomplete washing, uncured resin residue, contaminated cleaning liquid, insufficient or unsuitable post-curing, or material-specific surface behavior. Determine whether the problem is liquid retention or another process stage.
Do hollow resin prints need longer drying?
They often need more careful drainage and inspection because cleaning liquid can remain in internal cavities and channels. The key is not automatically “longer”; it is verified flushing, drainage and complete drying of the hidden geometry.
Can I use compressed air to dry resin prints faster?
Only use an airflow method that is compatible with the resin, cleaning liquid and workplace safety procedure. Uncontrolled air can spread contaminated droplets or introduce dust. A validated, clean and appropriately controlled process is preferable.
Should supports be removed before or after UV curing?
Either sequence can be appropriate depending on the resin, geometry and surface requirement. Some workflows remove supports before full curing to reduce cutting effort; others retain supports for stability. Follow the resin and application-specific process and validate the effect on dimensions and surface quality.
PROJECT REVIEW
Validate the complete workflow on your actual part
For printer, resin or post-processing evaluation, send the model file, overall dimensions, intended application, material requirements, quantity, critical surfaces, fit or tolerance concerns, and the inspection method you plan to use. Representative-part validation is more useful than choosing a drying or curing time in isolation.