
Rapid Tooling Cost vs Aluminum Tooling: Which Is Cheaper?
Manufacturing Cost & Tooling Selection
Resin 3D printed tooling can offer lower initial costs and faster design changes than CNC-machined aluminum tooling. However, aluminum molds often become more economical when production volumes increase, repeatability matters, or the process involves sustained heat and pressure.
The better choice depends on the number of acceptable parts required, mold complexity, material processing conditions, expected tool life, and the cost of replacing or modifying the tool.
A meaningful comparison should focus on total project cost and cost per accepted part, rather than the purchase price of the mold alone.
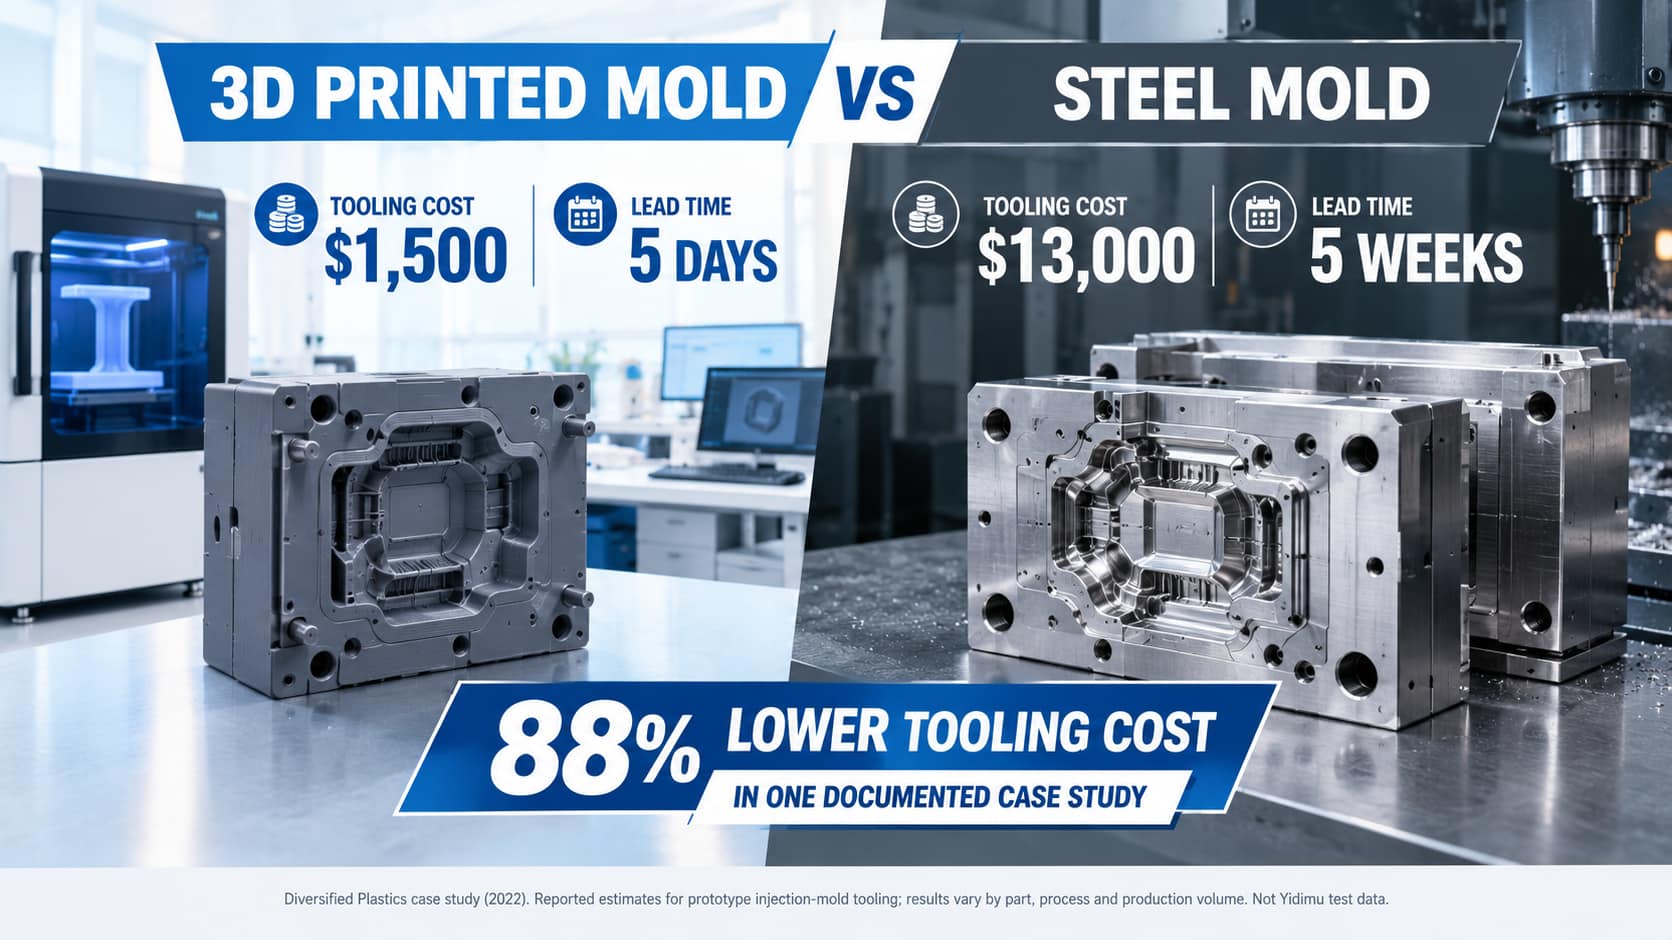
What Is the Difference Between Rapid Tooling and Aluminum Tooling?
Rapid tooling is a broad manufacturing approach used to produce molds, patterns, inserts, or production aids with shorter development cycles than conventional tooling workflows.
It may involve resin 3D printing, CNC machining, silicone tooling, or a combination of manufacturing processes. Aluminum tooling can also be classified as rapid tooling, particularly when it is used for prototype injection molding and bridge production.
For a useful cost comparison, this article focuses on two specific approaches:
Resin 3D printed tooling: Photopolymer molds, mold inserts, forming tools, or master patterns produced using a resin 3D printing workflow.
CNC aluminum tooling: Machined aluminum mold components designed for molding or related production operations.
Rapid Tooling vs Aluminum Tooling: Cost and Performance Comparison
| Comparison Factor | Resin 3D Printed Tooling | CNC Aluminum Tooling |
|---|---|---|
| Initial tooling cost | Often lower for small, relatively simple tools | Typically higher machining and setup investment |
| Design modifications | Revised geometry can be reprinted without rebuilding a machining setup | Changes may require additional machining or replacement inserts |
| Lead time | Potentially short, subject to printing, cleaning, curing, finishing, and assembly | Depends on CNC machining, finishing, assembly, and machine-shop capacity |
| Thermal performance | Limited by resin properties and actual operating conditions | Generally better heat transfer and thermal durability |
| Pressure resistance | Must be validated for the intended pressure and tool design | Better suited to conventional injection molding loads |
| Tool life | Often shorter, particularly under repeated thermal and mechanical loads | Generally supports more production cycles |
| Production economics | May favor small batches and frequent design iterations | May favor repeat orders and larger production volumes |
| Typical role | Tool validation, masters, experimental inserts, and selected short runs | Injection molding, bridge production, and repeat manufacturing |
These are general engineering tendencies, not guaranteed outcomes. Tool size, geometry, processing method, and material selection may change the economics significantly.
What Determines the Real Cost of Rapid Tooling?
The material required to print a mold is only one component of the total expense. A printed tool may also require substantial finishing, mounting hardware, dimensional corrections, and process qualification.
1. Tool Design and Engineering
Both approaches require suitable CAD geometry, parting lines, draft considerations, and an appropriate strategy for removing the finished part.
Complex undercuts, thin walls, deep cavities, and demanding surface requirements increase tooling complexity regardless of how the mold is manufactured.
2. Manufacturing and Post-Processing
Resin tooling costs may include printing materials, machine operation, supports, washing, UV curing, secondary machining, surface finishing, and fixture assembly.
Aluminum tooling costs may include raw metal, CNC programming, machining time, electrical discharge machining where required, polishing, inspection, and mold assembly.
3. Mold Life and Replacement Costs
A resin mold exposed to repeated thermal cycling, clamping loads, and demolding forces may require replacement earlier than an equivalent metal mold.
If several printed tools are needed to complete a production order, those replacement costs must be included in the project estimate.
4. Production Cycle Time
Mold material influences heat transfer. In injection molding applications, a polymer tool may require longer cooling or recovery intervals than a metal mold.
Even when initial tooling is inexpensive, extended cycle times can increase machine occupancy and labor costs as production volume grows.
5. Inspection, Scrap, and Rework
Parts with flash, distortion, incomplete filling, or unacceptable dimensions consume production resources without contributing to the quantity of accepted parts.
The comparison should therefore use accepted finished parts, rather than the total number of molding cycles or attempted prints.
How to Calculate the Cost per Part
Engineers and purchasing teams can use a simple total-cost model to compare resin tooling and aluminum tooling on the same project.
= Initial Tooling + Qualification + Replacement Tools + Production + Inspection + ReworkCost per Accepted Part= Total Project Cost / Number of Accepted PartsProduction costs should reflect machine time, labor, material consumption, and the expected yield. Replacement tooling should be calculated from a validated or defensible estimate of tool life.
Finding the Break-Even Production Volume
When both methods have approximately constant per-part costs and no additional tool replacements within the evaluated volume, a simplified break-even calculation is:
Break-Even Quantity = (Aluminum Fixed Cost - Resin Fixed Cost) / (Resin Variable Cost per Part - Aluminum Variable Cost per Part)This formula applies only when the denominator is positive and the estimated costs remain valid over the relevant quantity range.
In practice, printed tool replacement can introduce step changes in cost. When replacement molds are required, calculate the total cost at each candidate order quantity instead of relying only on a single break-even formula.
When Is Resin 3D Printed Tooling More Economical?
Early Product Development
When a component is still undergoing dimensional or functional changes, committing to a machined mold may create unnecessary modification costs.
Resin 3D printing allows engineering teams to evaluate geometry, surface details, and assemblies before committing to production tooling.
Master Patterns for Casting and Mold Making
A printed master can be used to evaluate a downstream molding or casting workflow, subject to material and process compatibility.
In this arrangement, the printed object serves as a pattern rather than the production mold itself. The cost analysis must include the downstream mold-making process and the expected life of that mold.
Selected Low-Load Forming Applications
Resin-printed tools may be considered for selected forming or low-volume applications where the temperature, pressure, surface quality, and mechanical requirements remain within the capabilities of the chosen material.
Suitability must be established through representative process trials. A standard modeling resin should not automatically be treated as suitable for injection molding.
When Is Aluminum Tooling the Better Investment?
Aluminum tooling becomes attractive when the production program requires more than a quick geometry check.
Repeated production orders: The initial mold cost can be distributed over a larger number of finished parts.
Conventional thermoplastic injection molding: Metal tooling generally handles processing loads more effectively than photopolymer tooling.
Consistent production cycles: Better thermal conductivity may support more efficient cooling and stable cycle planning.
Dimensional repeatability: Machined tooling is often more appropriate when the manufacturing process must maintain critical dimensions over extended runs.
Bridge production: Aluminum molds can support production while a higher-volume tooling program is being prepared.
Aluminum is not automatically the lowest-cost answer for every project. Complex cavity geometry, tooling modifications, and unusually small order quantities may make alternative workflows more attractive.
Tooling Selection: A Practical Decision Framework
The following decision sequence helps manufacturing teams avoid comparing tools that serve fundamentally different purposes.
Step 1: Do You Need Parts Made From the Final Production Material?
If the immediate goal is appearance, fit, or assembly review, direct resin 3D printing may eliminate the need for a mold. If the final thermoplastic properties must be evaluated, a molding process may be necessary.
Step 2: What Thermal and Mechanical Loads Will the Tool Experience?
Record the working temperature, injection or forming pressure, clamping forces, contact time, and removal forces. Reject tooling materials that cannot be qualified for these conditions.
Step 3: How Many Accepted Parts Are Required?
Use the total planned quantity, including repeat orders and foreseeable replacement production. Do not base tool selection exclusively on the first sample batch.
Step 4: Is the Design Likely to Change?
Frequent revisions favor flexible tooling strategies. A stable, approved design may justify a larger initial tooling investment.
Step 5: Which Option Has the Lower Qualified Project Cost?
Compare tooling, replacement, cycle time, inspection, scrap, and rework costs. Select the process that meets the technical acceptance criteria at an appropriate total cost.
Validate Tooling Performance Before Scaling Production
A successful first molded part does not establish the useful life of a mold. Performance must be assessed across repeated production cycles under representative conditions.
A practical validation plan should record:
| Validation Item | What to Record | Decision Purpose |
|---|---|---|
| Dimensional inspection | Critical dimensions of the tool and molded parts | Confirm fit and tolerance requirements |
| Processing conditions | Temperature, pressure, clamping, and cooling settings | Evaluate compatibility and repeatability |
| Tool condition | Cracks, wear, distortion, and surface damage | Identify deterioration during repeated use |
| Part acceptance | Accepted and rejected quantities with reasons | Calculate actual production yield |
| Cycle time | Actual time required per production cycle | Estimate manufacturing throughput |
| Tool replacement | Replacement frequency and associated downtime | Calculate total ownership cost |
If the tool shows progressive dimensional drift, cracking, or unacceptable surface deterioration, production should be stopped and the tooling condition investigated before further use.
The key output is not simply whether the mold worked once. It is whether the process can consistently deliver acceptable parts at a predictable cost.
How Resin 3D Printing Fits Into a Tooling Development Workflow
Industrial resin 3D printing can support tooling development without necessarily replacing metal production molds.
Engineering teams may use printed prototypes to evaluate component geometry, assembly interfaces, and surface features before committing to aluminum machining. Printed master patterns may also be evaluated for compatible downstream molding processes.
Yidimu provides industrial resin 3D printing solutions for product development, engineering models, and factory sample preparation.
Equipment such as the Yidimu Eternal M2 industrial resin 3D printer can be considered for industrial prototype and sample-development workflows, with equipment selection based on model size, resin compatibility, and required post-processing.
Direct use of printed parts as injection mold inserts requires separate verification of thermal, mechanical, dimensional, and processing requirements. Printer capability or ordinary resin data alone does not establish mold suitability.
For teams evaluating printed samples before investing in machining, Yidimu also provides a sample printing service for application review.
Frequently Asked Questions
Is rapid tooling always cheaper than aluminum tooling?
No. A 3D printed polymer tool may have a lower initial manufacturing cost, but mold replacement, finishing, cycle time, and rejected parts can change the total cost. Aluminum tooling may be more economical for larger or repeated production runs.
How many parts can a resin 3D printed mold produce?
There is no universal production quantity. Tool life depends on resin formulation, mold geometry, processing temperature, pressure, cooling, material adhesion, and demolding forces. A representative trial is necessary to estimate useful life.
Can aluminum molds be considered rapid tooling?
Yes. Rapid tooling describes the manufacturing strategy and development timeline rather than one specific material. CNC-machined aluminum molds are commonly used for rapid injection molding and bridge production.
Can resin 3D printing replace aluminum injection molds?
In selected low-volume applications, qualified printed inserts may provide a practical alternative. However, standard resin tooling should not be assumed to withstand conventional injection molding conditions, and it is not a universal replacement for aluminum tooling.
Is direct 3D printing cheaper than making a mold?
It can be for prototypes or small quantities, especially when the design is changing. At higher quantities, a molding process may achieve a lower unit cost. The final material requirements and total production quantity should determine the comparison.
Final Recommendation: Compare the Whole Manufacturing Process
Resin 3D printed tooling is most attractive when development flexibility, short production runs, and low initial investment are priorities. Aluminum tooling often becomes a stronger choice when the design is stable and the process requires repeated molding cycles or sustained thermal and mechanical performance.
Rather than selecting a mold solely by its purchase cost, evaluate the complete process from initial design through the required number of accepted finished parts.
For many product development projects, the most practical strategy is staged: validate the design with printed prototypes, evaluate the intended material and manufacturing process, and invest in metal tooling when production requirements justify it.
Evaluate Your Industrial 3D Printing Application
Planning a tooling or product development project? Share your CAD model, dimensions, material requirements, critical tolerances, and expected production quantity with Yidimu.
Our team can discuss whether resin 3D printed samples are suitable for your evaluation workflow and help review equipment, resin, and post-processing options.
Discuss Your ProjectReferences
Formlabs. How to Estimate Injection Molding Cost?
https://formlabs.com/blog/injection-molding-cost/Formlabs. Injection Molding: Design Considerations and Limitations for 3D Printed Molds.
https://formlabs.com/support/Injection-molding/Protolabs. 3D-Printed Molds vs. Aluminum Tooling.
https://www.protolabs.com/resources/blog/3d-printed-molds-vs-aluminum-tooling/Protolabs. Aluminum Mold Tooling for Injection Molding.
https://www.protolabs.com/resources/blog/aluminum-mold-tooling-for-injection-molding/