
Resin 3D Printing Small Batch Production: Can the Same Result Hold Across Repeated Builds?
A single acceptable part proves that a geometry can be printed. Small batch production asks a harder question: will build number twelve be interchangeable with build number one? This guide explains which properties actually need to be measured, how to run a repeatability study on your own part, and how to read the result before committing a production job to resin printing.
- Why repeatability, not resolution, decides whether a resin process can carry a batch
- The difference between repeatability, reproducibility, accuracy, precision and tolerance
- A within-build and between-build test structure you can run on a representative part
- A blank recording template for build-to-build measurement data
- How to interpret position-dependent bias, batch-to-batch shift and slow drift
Direct Answer
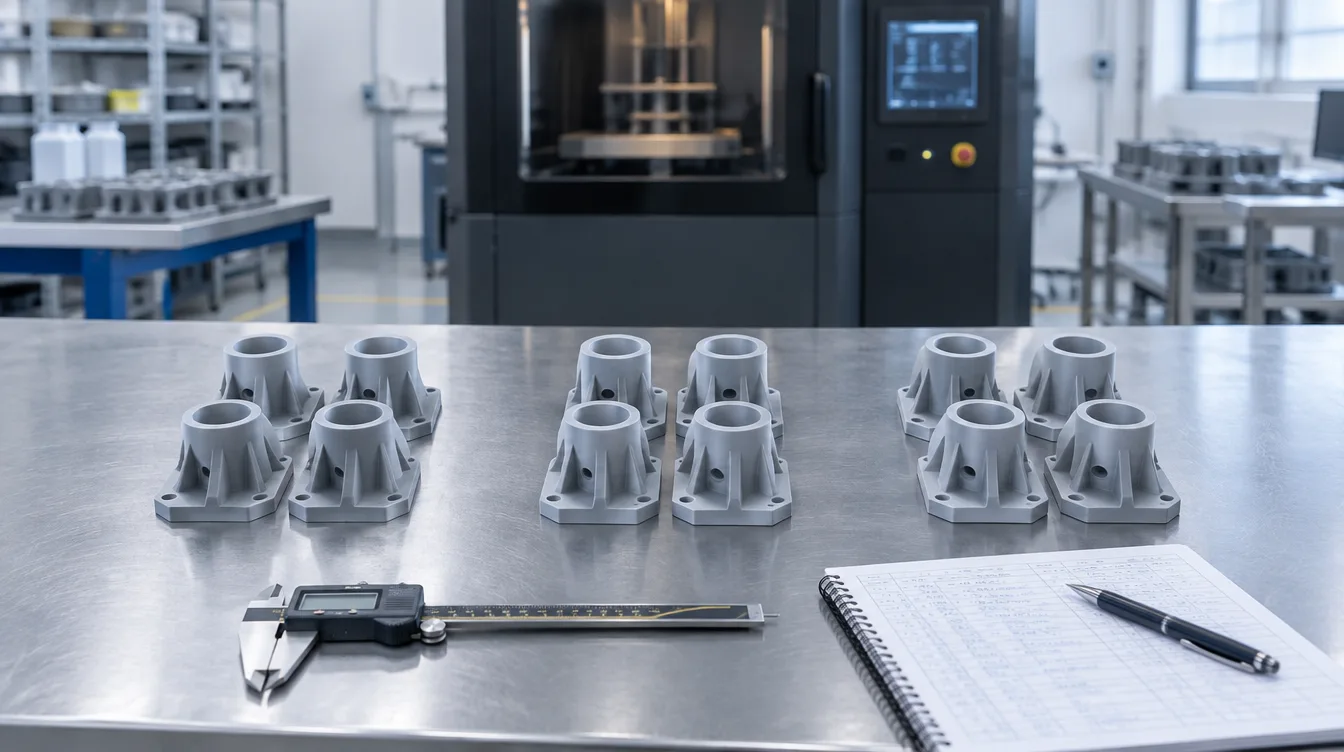
Resin 3D printing can hold the same result across repeated builds, but only when the process around the printer is fixed and monitored. Consistency comes from controlling resin lot and temperature, exposure settings, part orientation, nesting position, washing, complete drying, UV post-curing and the measurement method itself — not from a printer's pixel count. Before a batch is committed, the process should be qualified: print the same representative part several times within one build and across several separate builds, measure the same features the same way after full post-curing, and compare the observed spread against the tolerance the part actually needs. If the spread consumes most of the tolerance, the process is not yet ready for production.
Key Takeaways
- Repeatability is a property of the whole workflow, not a specification printed on a machine data sheet.
- XY pixel size, screen resolution, layer height and build volume describe capability. None of them can be converted into a dimensional tolerance.
- Variation must be separated by source: within a build, between builds, between resin lots, and between operators or measurement methods.
- Parts should be measured after washing, complete drying and UV post-curing, because dimensions and mechanical behaviour can change during those steps.
- Qualification is geometry-specific. A result obtained on one part does not transfer automatically to a different wall thickness, height or feature type.
- A process is production-ready when the observed deviation leaves usable margin inside the required tolerance, not when it merely fits.
The Terms Have to Be Separated First
Most disagreements about whether resin printing is "accurate enough" for small batch production come from mixing terms that describe different things. A purchasing discussion that treats them as synonyms will produce a decision that cannot be verified afterwards.
| Term | What it actually describes |
|---|---|
| Screen resolution | The pixel count of the LCD panel in a masked-exposure system. A counting figure for the display, nothing more. |
| XY pixel size | The physical size of one pixel in the build plane. It sets a lower bound on how finely a layer image can be described. It is not a dimensional error budget. |
| Layer height | The commanded Z increment per layer. It affects surface stepping and exposure behaviour. It is not the same as Z-axis positioning accuracy. |
| Accuracy | How close a measured dimension sits to the nominal CAD value. Systematic offset is an accuracy problem and can often be compensated. |
| Precision | How tightly repeated measurements cluster, regardless of whether they cluster on the correct value. |
| Repeatability | Spread observed under conditions kept as constant as possible: same machine, same resin lot, same settings, same operator, same measurement method. |
| Reproducibility | Spread observed when one condition deliberately changes: another machine, another resin lot, another operator, another site or another day. |
| Tolerance | The permitted band defined by the part's function and assembly. It comes from the design, not from the printer. |
| Deviation | The measured difference between a single result and the nominal value or the batch mean. It is data, not a specification. |
Manufacturer figures such as "print accuracy" are stated values obtained under the manufacturer's own conditions. They should be treated as a starting reference for evaluation, not as a guaranteed tolerance for your geometry.
The practical consequence is simple. A machine with a small XY pixel size can still produce inconsistent batches if resin temperature drifts, if parts are nested differently every time, or if post-curing time varies with operator availability. Equally, a system with a larger pixel size can hold a batch together well if the workflow around it is disciplined. This is also why exposure consistency across the build area deserves separate attention from resolution figures.
Where Batch Variation Actually Comes From
Before designing a test, it helps to list the realistic sources of variation. Each one produces a recognisable signature in the data, which makes diagnosis far quicker later.
Material
- Resin lot change, including a new bottle of the same product
- Resin temperature at the start of a build, and temperature change during long builds
- Mixing, settling and contamination of resin left in the vat between jobs
Machine and process settings
- Exposure time, lift and retract behaviour, and any slicer profile edits
- Platform levelling and mechanical condition
- Consumable condition, including release film and optical components as they age
Layout
- Part orientation relative to the build plane
- Support density, contact size and placement
- Position on the platform, and whether parts sit in the same locations each time
Post-processing
- Wash medium, wash time and fluid saturation as it is reused
- Drying completeness before curing, which is frequently the largest uncontrolled step
- UV post-cure time, part spacing inside the curing chamber and part temperature
Measurement
- Instrument, contact force, datum selection and operator technique
- Time between curing and measurement, and ambient temperature at measurement
Because these interact, changing two variables at once during qualification usually wastes the build. Batch layout, throughput and the cost consequences of rework are covered separately in the guide on resin 3D printing for low-volume manufacturing.
A Qualification Method You Can Run on Your Own Part
1. Define acceptance before printing anything
List the features that determine whether the part works: mating diameters, hole positions, overall length, flatness of a sealing face, wall thickness at a thin section. Assign each one a tolerance derived from function. Features without a stated tolerance cannot pass or fail a test.
2. Choose a representative part, not a demonstration model
Use the real geometry, or a test article that carries the same wall thicknesses, heights, hole sizes and unsupported features. If several parts will share a build, include the ones that behave differently. Adding a few simple witness features — a gauge block, a stepped cylinder — makes measurement faster without replacing the real part.
3. Freeze the process on paper
Write a one-page process sheet: resin product and lot, slicer profile version, orientation, support settings, nesting map, wash time and medium, drying method and duration, UV cure time, rest period before measurement, measurement instrument and datum scheme. Qualification data without a fixed process sheet cannot be reproduced later.
4. Test within-build repeatability
Print several copies of the part in a single build, distributed deliberately across the platform — centre, corners, front and rear. This exposes position-dependent behaviour that a single centred part will never reveal.
5. Test between-build repeatability
Repeat the identical build several times, ideally on different days, keeping the nesting map unchanged. Then introduce one controlled change — commonly a new resin bottle of the same product — and treat that as a reproducibility check rather than as more repeatability data.
6. Measure the same way every time
Measure only after complete drying and full UV post-curing, after the defined rest period, using the same instrument, datums and operator. If a second operator will run production, have both measure the same parts once so that operator contribution is visible rather than hidden inside the totals.
7. Compare spread against tolerance, not against expectation
For each feature, record the mean deviation from nominal and the spread. Systematic offset that repeats consistently can often be compensated in the model or slicer. Random spread cannot be compensated and is the figure that determines whether the process can hold the batch.

Recording Template
The template below is intentionally empty. Fill it with your own part, your own features and your own measured values — figures copied from any manufacturer, including YIDIMU, will not describe your geometry or your workflow.
| Build ID | Date | Resin lot | Platform position | Feature A | Feature B | Feature C | Wash / dry | UV cure | Operator | Accept / reject |
|---|---|---|---|---|---|---|---|---|---|---|
| Feature | Nominal | Required tolerance | Mean deviation | Within-build spread | Between-build spread | Margin remaining |
|---|---|---|---|---|---|---|
Reading the Result
Once the tables are populated, the pattern matters more than any single number.
- Consistent offset on every part, every build. A systematic accuracy issue. Usually addressable through exposure adjustment, scaling compensation or support and orientation changes. It does not indicate an unstable process.
- Deviation that correlates with platform position. Points towards exposure behaviour across the build area, platform levelling or resin flow and temperature distribution, rather than towards random variation.
- Tight within-build spread but larger between-build spread. The printing step is behaving; something that changes between jobs is not. Resin temperature, vat condition, wash fluid saturation and cure loading are the usual candidates.
- Scatter that follows no pattern at all. Check the measurement method before blaming the printer. Datum choice and drying state produce convincing-looking noise.
- Slow drift across many builds. Often consumable condition or accumulated mechanical change. This is where planned intervals matter; see the guide on industrial resin 3D printer maintenance cost.
- Spread that consumes almost the entire tolerance. Technically passing, practically fragile. A batch qualified with no margin will fail as soon as a resin lot or an operator changes.
Common Mistakes
- Treating one successful print as evidence of production capability.
- Converting XY pixel size or layer height into an assumed tolerance.
- Measuring parts before they are completely dry or fully post-cured.
- Changing the nesting layout between qualification builds, which destroys position comparability.
- Altering two or more variables in the same build, leaving the result uninterpretable.
- Qualifying on a demonstration model instead of the real geometry, then discovering thin walls or tall features behave differently.
- Comparing measurements taken by different operators with different datums and calling the difference machine variation.
- Assuming a qualified process stays qualified after a resin change, a firmware or profile update, or a consumable replacement.
Limitations and What Still Has to Be Validated
A short qualification study is a decision aid, not a statistical proof. A handful of builds gives a usable indication of behaviour and will reliably expose gross instability, but it does not establish a long-run capability figure. Treat the result as a basis for starting production with monitoring in place, and continue recording data during the first real jobs.
Several boundaries are worth stating explicitly. The result belongs to the geometry tested: a taller part, a thinner wall or a different support strategy can behave differently on the same machine. Elastomer parts need their own approach, because dimensional measurement under contact force is influenced by the material itself and lattice structures may need fixture-based or load-controlled measurement rather than simple caliper readings. And any figure taken from a catalogue or product page is a manufacturer-stated value produced under manufacturer conditions.
YIDIMU does not publish part-level repeatability datasets for specific customer geometries, and no such figures should be assumed. The practical route is representative-part testing: print your own model, run the repeat builds, and measure against your own acceptance criteria. This is also the most useful thing to request from any supplier during evaluation, as discussed in the manufacturer evaluation guide.
Relevant YIDIMU Systems
The systems below are masked-exposure (LCD / MSLA) machines: a 405 nm area light source is masked by an LCD panel and a full layer is exposed at once. YIDIMU's laser stereolithography system uses a fundamentally different imaging method and should not be evaluated on the same exposure assumptions. Machine selection for a batch job should follow from part size, material requirement, nesting layout and post-processing capacity — not from a headline specification.
Eternal M1
A 13.6-inch masked-exposure industrial system for medium-size models and multi-part builds. A reasonable starting point where batches consist of several moderate parts per platform and the layout can be kept identical between builds.
Eternal M2
A 16-inch masked-exposure industrial system with a larger build area, intended for bigger single parts or higher part counts per build. Larger platforms make position-dependent checks more important, not less, so the distributed-sample test above applies directly.
Flex G2
A masked-exposure system configured for elastomer materials in the 50A–90A hardness range, used for lattices, cushioning structures and flexible functional parts. Batch consistency for flexible parts should be assessed on functional behaviour as well as dimensions, since geometry and post-curing strongly influence how a soft part performs.
Application context for batch work is collected on the small-batch production application page.
Qualification Checklist
- Critical features listed, each with a tolerance derived from function
- Representative part selected, carrying the real wall thicknesses and feature types
- Process sheet written and version-controlled, including the nesting map
- Resin product and lot recorded for every build
- Multiple copies distributed across the platform in at least one build
- Several identical builds completed, ideally on different days
- One controlled change tested separately as a reproducibility check
- Parts completely dried before UV post-curing
- Fixed rest period observed before measurement
- Same instrument, datums and operator used throughout; second operator checked once
- Mean deviation and spread recorded per feature, not per part only
- Remaining margin against tolerance evaluated before releasing the process
- Re-qualification triggers defined: resin change, profile update, consumable replacement, machine relocation
Frequently Asked Questions
Is resin 3D printing suitable for small batch production?
It can be, for part sizes and materials that suit vat photopolymerisation, provided the complete workflow is controlled and the required tolerances are known. Suitability is decided by qualification on the actual part, not by the technology label.
How many builds are needed before a process can be trusted?
There is no universal number. A few identical builds with several distributed copies each will expose obvious instability. Confidence increases as production data accumulates, which is why monitoring should continue after the initial study rather than stopping at a pass result.
Does a higher-resolution printer give better batch consistency?
Not by itself. Resolution and XY pixel size describe how finely a layer image can be defined. Consistency between builds is determined mainly by material handling, thermal conditions, layout discipline and post-processing control.
Why do parts change dimensions after post-curing?
Photopolymer parts continue to cure during UV post-processing, and both dimensions and mechanical properties can shift. Incomplete drying before curing adds further variation. For this reason, measurements taken before the full workflow is finished are not comparable with production parts.
What changes require re-qualification?
A different resin product, a significant profile or exposure change, replacement of key consumables, a machine move, or a change in the post-processing routine. Each of these can shift the mean, the spread, or both.
Can flexible elastomer parts be qualified the same way?
The structure of the study is the same, but the acceptance criteria usually are not. Soft parts often need functional checks — compression behaviour, recovery, fit against a mating surface — alongside dimensional data, and measurement must account for deformation under contact.
Send the Part, Not Just the Batch Size
Share the model, material requirement, target tolerance, batch quantity and inspection criteria, and the printer, resin and post-processing workflow can be reviewed against the actual production requirement before equipment is selected.
Submit Your Model Contact YIDIMU