
Dental 3D Printing · Dimensional Validation
Dental Model 3D Printing Accuracy: How to Test the Finished Model
Dental model 3D printing accuracy should be evaluated on the finished, post-processed model—not inferred from screen resolution, XY pixel size, or a single successful print. A useful validation plan separates trueness from repeatability, controls the complete resin workflow, and measures features that matter to the actual laboratory application.
- Separate trueness, precision, repeatability, resolution and dimensional tolerance.
- Measure models only in a defined and consistent finished condition.
- Use repeated builds and, when relevant, different build-platform positions.
- Record printer, resin, orientation, supports, post-processing and measurement conditions.
- Confirm the process with representative dental models, not only calibration coupons.
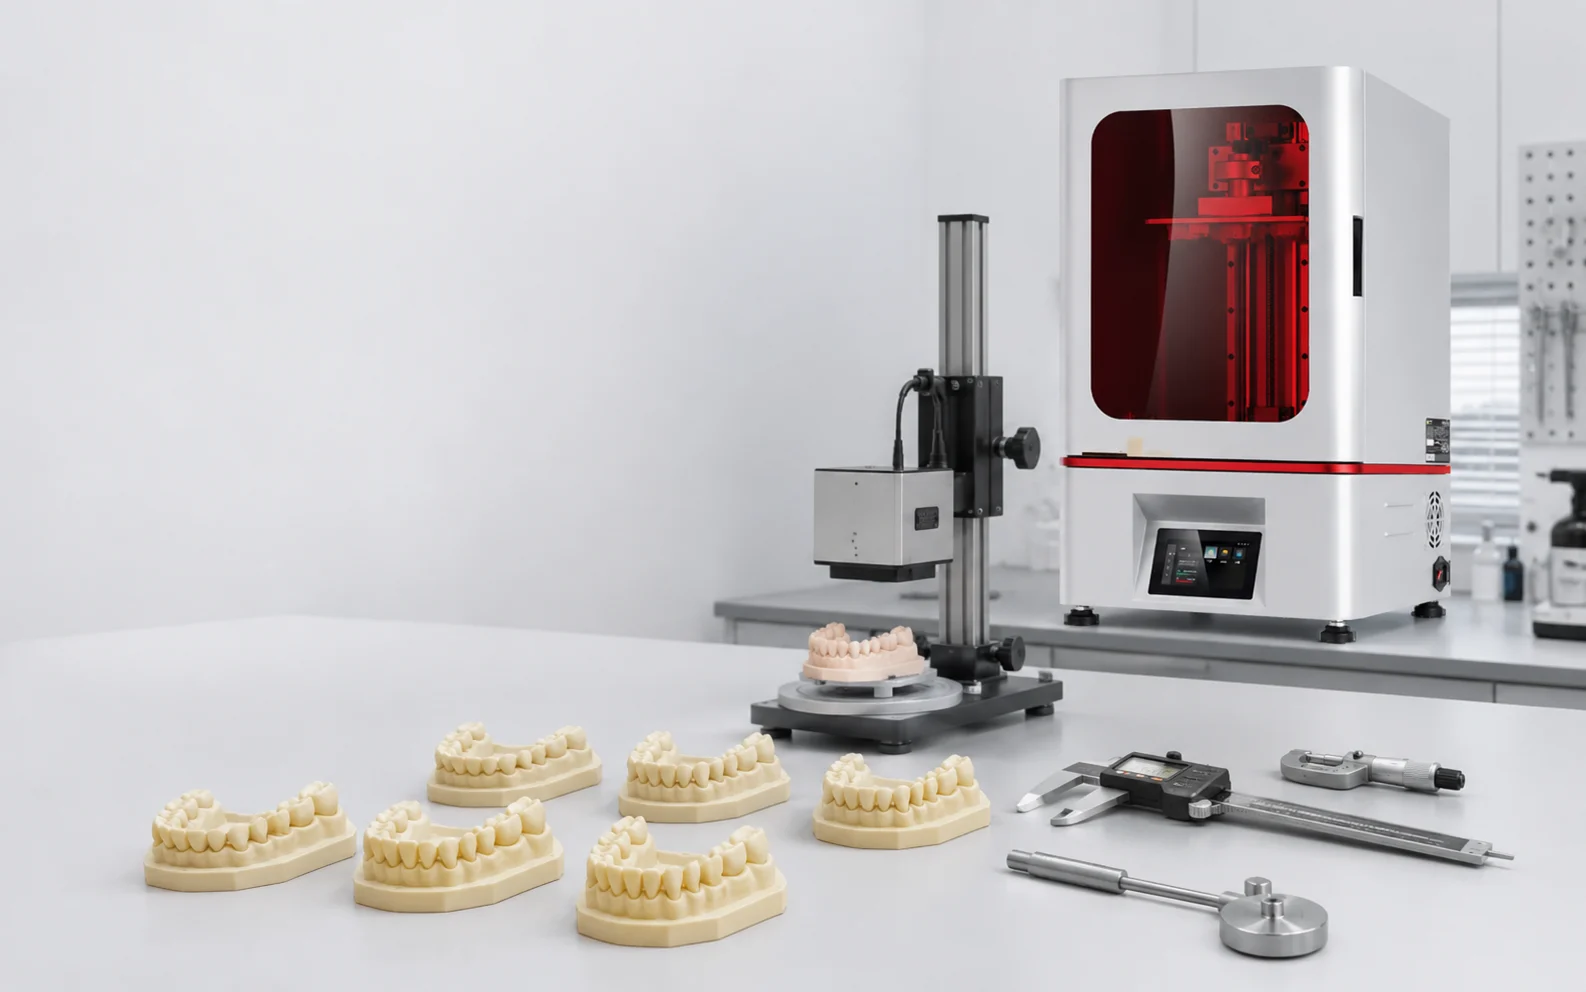
Direct Answer: What Does a Dental Model Accuracy Test Actually Measure?
A dental model accuracy test asks two different questions: how closely the finished model matches the approved digital reference, and how consistently the same process reproduces that result. The first question is primarily about trueness; the second is about precision and, under tightly controlled conditions, repeatability.
One print cannot establish repeatability. The printer, resin, file, orientation, support strategy, build position, exposure settings, platform condition, washing, complete drying, UV post-curing, finishing and measurement method should be controlled or documented. Otherwise, dimensional variation from post-processing or inspection can easily be mistaken for printer variation.
Key Takeaways
- Accuracy is not the same as resolution. A smaller XY pixel size describes the exposure system, not a guaranteed finished-model deviation.
- Trueness and repeatability answer different questions. A process may repeatedly produce the same dimensional bias.
- Post-processing is part of the dimensional process. Washing, complete drying, curing and finishing must be included in the test plan.
- Within-build and build-to-build variation should be separated. Several models in one print do not provide the same evidence as independent print cycles.
- The measurement system also contributes variation. Scanner accuracy, registration strategy, datum definition, contact force and operator technique can affect the reported result.
- The final validation should use the real dental model geometry. A coupon can isolate variables, but it cannot establish suitability for every arch design or laboratory workflow.
Dental Model 3D Printing Accuracy: Repeatability vs Accuracy vs Resolution
Dental printing discussions often use “accuracy,” “precision” and “resolution” as if they were interchangeable. They are not. ISO measurement terminology treats accuracy in relation to both trueness and precision, while repeatability describes precision under a defined set of substantially unchanged conditions.
| Term | Practical meaning | What it does not mean |
|---|---|---|
| Accuracy | A broad concept describing how well results agree with the intended or reference value, considering trueness and precision. | Not a synonym for LCD resolution. |
| Trueness | How closely the mean result from repeated measurements or parts agrees with the accepted reference value. | Does not describe part-to-part scatter by itself. |
| Precision | How closely repeated results agree with one another under specified conditions. | Does not prove the result is close to nominal. |
| Repeatability | Precision evaluated while keeping the relevant procedure, equipment, operating conditions and other defined factors as consistent as practical. | Not the same as comparing different printers, operators or laboratories. |
| Reproducibility | Consistency evaluated when specified conditions are changed, such as equipment, operator, location or other process factors. | Not a tightly controlled same-machine repeat test. |
| XY pixel size | The nominal physical sampling dimension associated with the exposure image at the build plane. | Not a finished-part dimensional tolerance. |
| Layer height | The nominal vertical layer increment selected for the printing process. | Not Z-axis accuracy or guaranteed surface deviation. |
| Dimensional tolerance | The allowable variation defined by the design, laboratory requirement or validation plan. | Not automatically determined by printer specifications. |
| Dimensional deviation | The measured difference between a finished feature and its defined nominal or reference value. | Does not identify the root cause on its own. |
Why Dental Model Accuracy Cannot Be Reduced to One Printer Specification
Published dental research uses different printers, materials, model geometries, orientations, layer settings, post-processing routes and measurement methods. Reported results therefore vary substantially, and a value from one study should not be transferred directly to another printer-resin-workflow combination.
Model design itself can matter. A full arch, removable-die model, hollow shell, solid base and orthodontic thermoforming model can respond differently to support loads and polymerization. Research has also examined effects from build orientation, layer thickness, shell design and post-processing. The practical implication is not that one universal setting is correct, but that these factors need to remain controlled during comparison.
For a broader dental production workflow, YIDIMU's dental 3D printing application guide similarly treats the model, printer, resin, build preparation, washing, drying, curing and inspection as one connected process.
How to Run a Dental Model 3D Printing Accuracy Test
1. Define the test objective before selecting the test model
Decide what decision the test must support. A printer-comparison study, a new resin qualification, a process-change investigation and routine production verification are different tests.
Define the critical characteristics first: overall arch dimensions, tooth-to-tooth distances, local tooth geometry, model base flatness, removable-die interfaces, seating features, holes, slots, walls or other dimensions relevant to the intended laboratory task.
2. Establish the nominal reference
If the purpose is to evaluate the printing process, use the approved digital model sent to the printer as the controlled nominal reference. If the workflow begins with an intraoral scan or a scan of a physical model, remember that the final printed-model deviation may contain upstream scanning and digital-processing errors as well as printing error.
Do not attribute the entire scan-to-print difference automatically to the printer.
3. Select a measurable test part
A useful test can combine dental geometry with features that can be inspected consistently. Depending on the application, the model may include external dimensions, defined tooth landmarks, flat reference surfaces, mating features, holes, slots or wall sections.
If a generic calibration artefact is used during process development, it should contain measurable positive and negative features rather than only decorative detail.
4. Freeze the printing variables
Record and hold constant the relevant printer, resin product and batch where practical, model revision, scaling, orientation, support strategy, layer settings, exposure profile, build-platform condition and operating environment.
If a variable is intentionally changed, treat that as a separate experimental group rather than combining the results into one repeatability dataset.
5. Separate within-build variation from run-to-run variation
Multiple identical models placed on one build can reveal part-to-part and position-dependent differences within that print cycle. They do not, by themselves, establish build-to-build repeatability.
Independent builds provide evidence about run-to-run consistency. The appropriate number of builds and samples should be selected according to project risk, quality requirements, measurement capability and any applicable validation or quality-system requirements rather than a universal internet rule.
6. Test multiple platform positions when position matters
If normal production uses a significant portion of the build platform, place equivalent models or test features in documented locations so center, edge and other relevant positions can be compared.
Persistent position-dependent deviation may justify investigation of platform condition, optical-field behavior, calibration, mechanics, resin flow or other process factors. A center-only test can miss this spatial behavior.
7. Standardize washing, complete drying and UV post-curing
The dimensional test is not finished when the printer stops. Process every sample using the same validated workflow for the selected resin and application.
Follow the applicable TDS, SDS, IFU or other formal material instructions for cleaning and curing conditions. Do not substitute a wash or cure time copied from an unrelated resin.
YIDIMU's dental model washing and curing workflow explains why washing, complete drying and material-specific UV post-curing should be controlled before dimensional inspection.
8. Use one defined measurement method
Select the measurement system according to the characteristic. Calipers or micrometers may be suitable for accessible linear dimensions. Gauges can be useful for defined openings or fit relationships. Qualified scanning and metrology software can evaluate complex surfaces and local deviation patterns.
When scan-to-CAD comparison is used, document the scanner, calibration condition, alignment strategy, excluded regions and analysis method. Best-fit alignment and datum-based alignment can answer different questions and may produce different reported deviations.
Also consider measurement uncertainty. If the inspection method cannot reliably distinguish the dimensional differences important to the project, increasing the number of printed samples will not solve the measurement problem.
Example Test Record
A useful record should preserve the raw measurements rather than only a pass/fail result. The table below is a template and contains no YIDIMU performance data.
| Build | Position | Feature | Nominal Dimension | Measured Value | Deviation | Notes |
|---|---|---|---|---|---|---|
| Build ID | Recorded platform position | Critical feature ID | From controlled CAD / specification | Measured result | Measured minus nominal | Resin lot, processing or inspection observations |
How to Interpret Dental Model Accuracy Results
Mean deviation
The mean signed deviation can reveal systematic bias. If the average repeatedly moves in one direction, investigate the process rather than looking only at absolute errors.
Range and standard deviation
The range shows the distance between the largest and smallest observed values, while standard deviation provides a more useful description of dispersion when the dataset and statistical assumptions justify its use. Report the actual statistic rather than describing a result only as “high precision.”
Outliers
An unusual result should trigger investigation. Check the build record, support damage, model contamination, post-processing, measurement setup and transcription before deciding whether the value is invalid. Do not remove an outlier merely because it makes the dataset look worse.
Run-to-run drift
Plotting dimensional deviation against build sequence can reveal gradual drift that a single average may hide. If later builds move progressively away from earlier results, examine process conditions and maintenance history.
Position-dependent variation
Compare results by platform location when multiple positions were tested. A stable spatial pattern deserves separate investigation from random part-to-part variation.
Surface RMS versus critical dimensions
A whole-surface RMS value can summarize a 3D comparison, but it is not equivalent to the tolerance of a specific tooth, seating surface or mating feature. A model can show an acceptable global average while a locally important feature deviates more than allowed.
Common Accuracy-Test Mistakes
- Testing only one print: one good model demonstrates possibility, not repeatability.
- Changing orientation between builds: the comparison then contains an additional process variable.
- Changing resin batches without recording the change: material variation becomes indistinguishable from equipment variation.
- Measuring before the finished post-processing state: dimensions may still change through drying, curing or finishing.
- Using different inspection methods: measurement-system variation can appear as printing variation.
- Confusing pixel size with accuracy: nominal image-plane sampling does not establish finished-part tolerance.
- Testing only the platform center: this can miss location-dependent behavior relevant to real batch layouts.
- Using only absolute deviations: this can hide consistent positive or negative dimensional bias.
- Comparing surface scans without defining alignment: registration choices can materially alter the reported map.
For a broader finished-part inspection method, see the resin 3D print quality inspection checklist.
Calibration Coupon vs Representative Dental Model
Standardized or purpose-designed test artefacts are valuable because simple measurable geometry can isolate process variables. Features such as holes, slots, walls, planes and external dimensions are easier to inspect repeatedly than complex organic anatomy.
The limitation is equally important: a coupon does not reproduce the arch span, tooth anatomy, base design, support configuration, local wall sections or handling conditions of a real dental model.
A practical validation sequence therefore uses coupons where they help diagnose the process, then confirms the selected printer-resin-profile combination with representative dental models processed and inspected exactly as intended in routine work.
Relevant YIDIMU Dental Resin 3D Printing Systems
YIDIMU currently lists Eternal Y8 and Eternal D1 for dental model and professional laboratory workflows. Their published display and build specifications can help with initial system screening, but they should not be converted into a claimed finished-model dimensional accuracy.
Eternal Y8
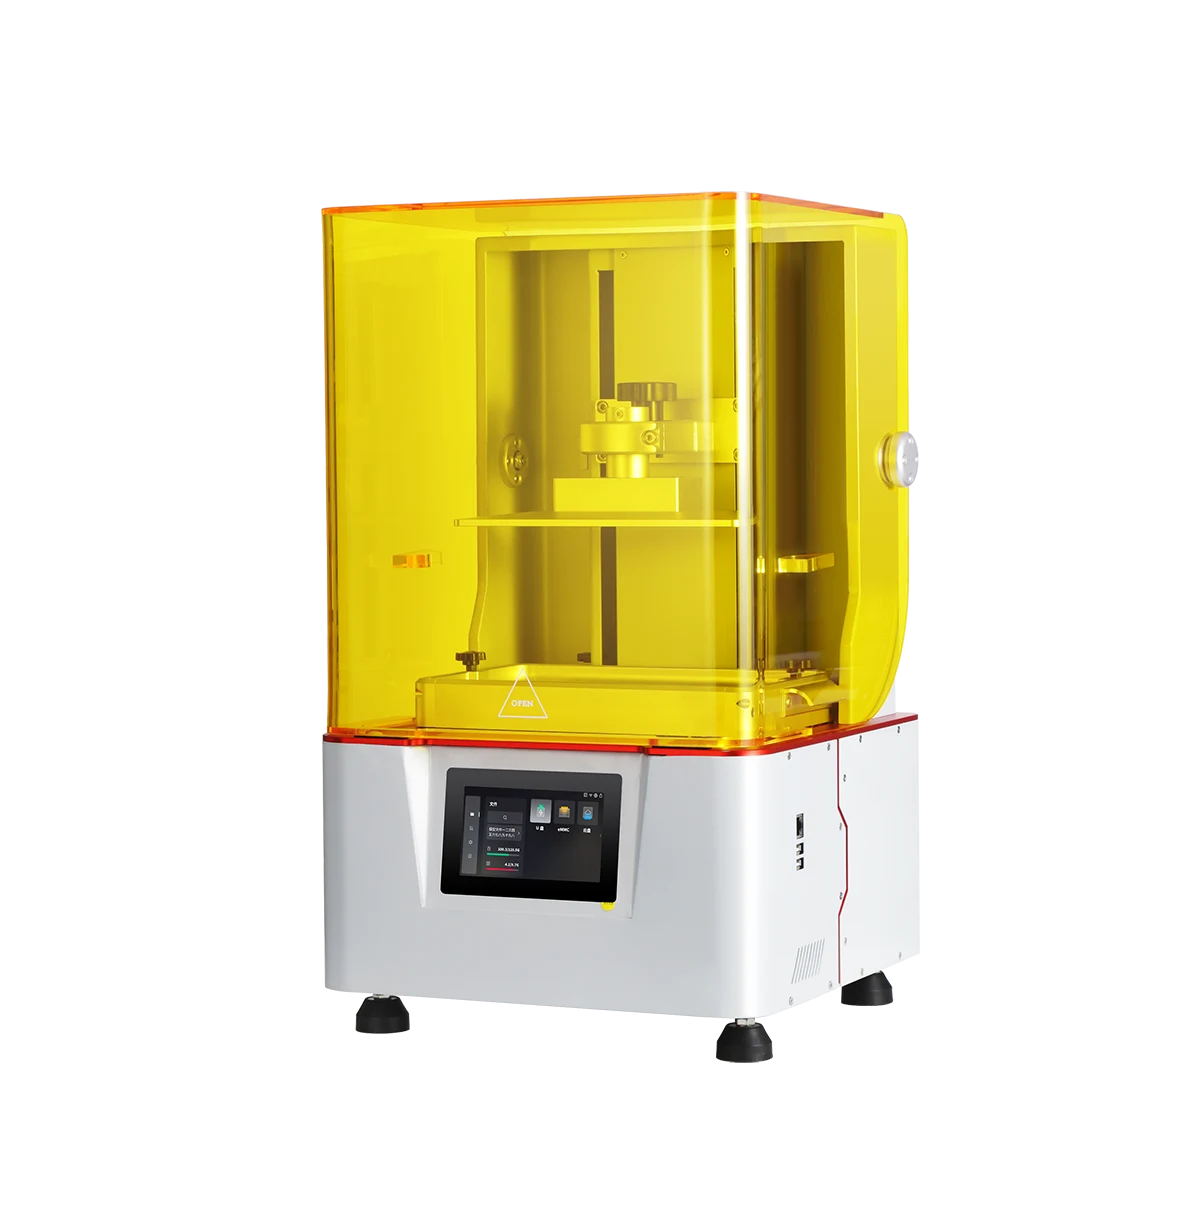
The current Eternal Y8 product information lists a 10.3-inch 8K 7680 × 4320 exposure display, a 228 × 128 × 235 mm build volume and a published 29.7 μm XY pixel size. YIDIMU positions the system for detailed dental models and professional resin-printing workflows.
These are equipment specifications. Finished-model dimensional performance should still be established with the selected resin, model geometry, orientation, process settings, post-processing and inspection method.
Eternal D1
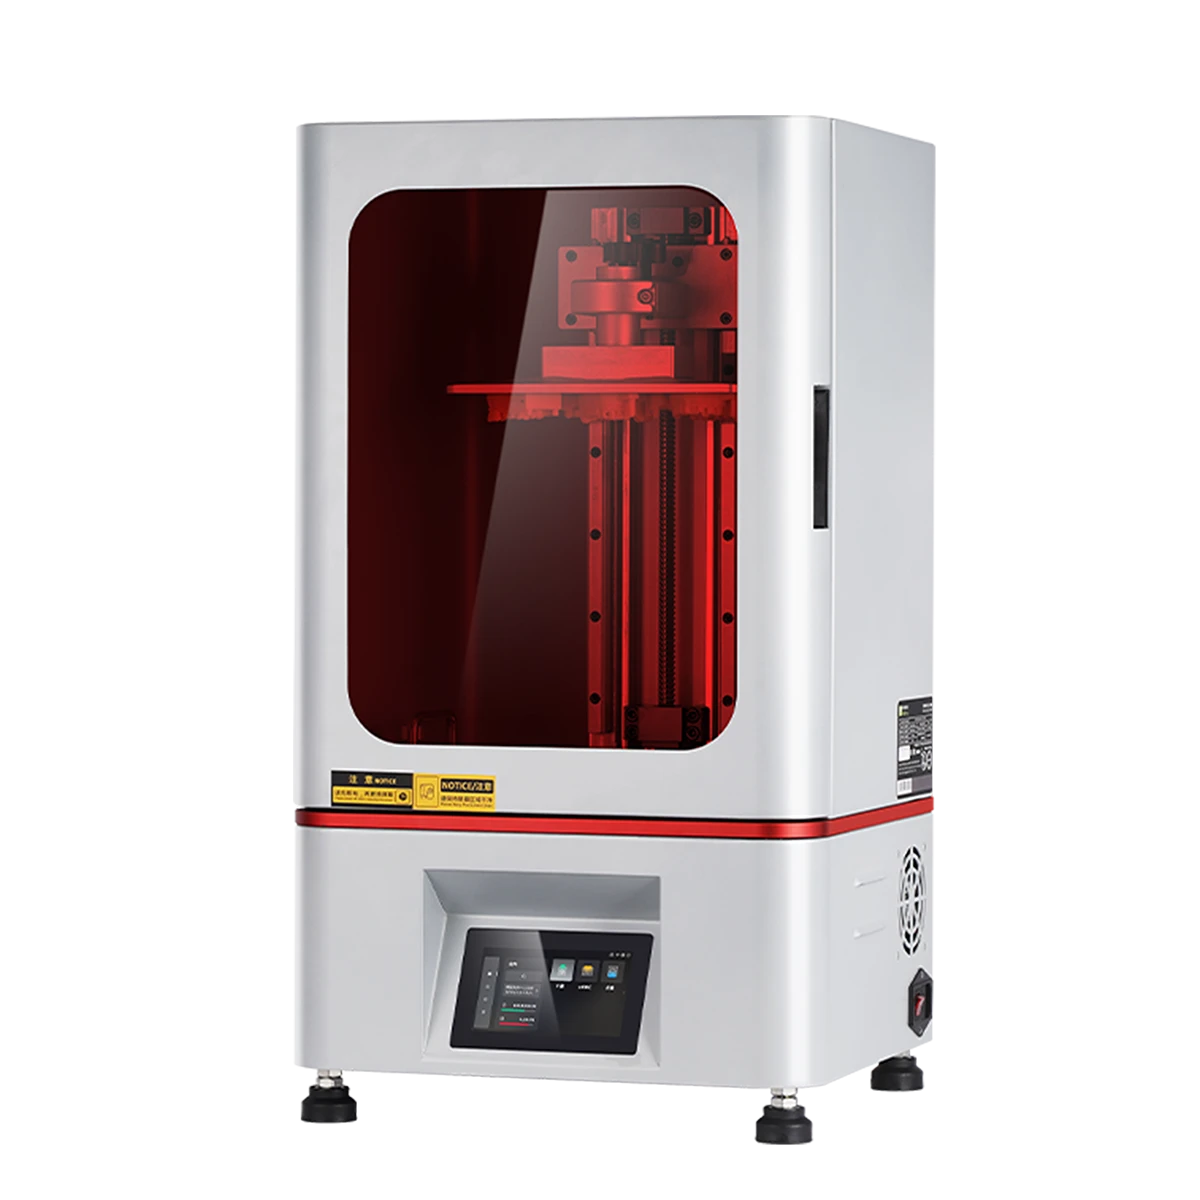
The current Eternal D1 product information lists a 10.1-inch 14K 13320 × 5120 exposure display, a 223 × 126 × 290 mm build volume, nominal X 16.8 μm / Y 24.8 μm XY pixel pitch and a 405 nm UV photopolymer wavelength.
The higher screen matrix and nominal pixel pitch describe the imaging system. They do not, by themselves, establish the dimensional accuracy, repeatability or acceptable tolerance of a finished dental model.
Practical Dental Model Accuracy Evaluation Checklist
- Define the dental model application and downstream use.
- Identify the controlled CAD/STL reference and file revision.
- List the critical dimensions, landmarks, surfaces and fit-related features.
- Define project-specific acceptance limits before printing.
- Record the exact printer and current condition.
- Record resin product and batch identification where relevant.
- Freeze orientation, supports, layer settings and exposure profile.
- Record build-platform position for each model.
- Use repeated independent builds when evaluating repeatability.
- Keep washing conditions consistent.
- Confirm complete drying before the next validated process step.
- Use the material-specific UV post-curing procedure.
- Define when support removal and finishing occur.
- Measure all samples at the same finished state.
- Use the same measurement instrument, fixture and procedure.
- Record measurement-system and scan-registration conditions.
- Compare mean deviation, dispersion, outliers, build drift and platform-position effects.
- Finish validation with a representative production dental model.
Limitations and Validation Boundaries
Nominal printer resolution is not a guaranteed dental model accuracy. XY pixel size and layer height describe parts of the printing process, while the finished geometry is influenced by the complete printer-resin-workflow combination.
One successful print is not repeatability evidence. Multiple copies in one build are useful for part-to-part and platform-location analysis but should not be confused with independent build-to-build testing.
A calibration coupon is not production validation. It can reveal geometric behavior under controlled conditions, but the real dental model may introduce different spans, wall sections, supports, orientation constraints and post-processing sensitivity.
Post-processing must be included in dimensional validation. Washing, residual cleaning liquid, incomplete drying, post-curing and finishing can affect the condition of the model that reaches inspection.
There is also no single dimensional threshold that can automatically define every printed dental model as acceptable. Orthodontic, prosthodontic, diagnostic, working-model and other laboratory applications can place different demands on geometry and fit. Acceptance criteria should therefore be defined for the actual application and applicable quality requirements.
Dental Model 3D Printing Accuracy FAQ
Is repeatability the same as accuracy?
No. Repeatability describes consistency under defined, substantially unchanged conditions. A process can repeatedly produce almost identical models while all of them contain the same dimensional bias from nominal.
How many dental models should be printed for an accuracy test?
There is no universal sample count suitable for every project. The number of parts and independent builds should be based on the test objective, process risk, expected variation, measurement capability, acceptance criteria and any applicable quality or validation requirements.
Should multiple build-platform positions be tested?
Yes when normal production uses a substantial portion of the platform or when location-dependent performance matters. Comparing documented center, edge and other production-relevant positions can reveal spatial patterns that a center-only test would miss.
When should resin dental models be measured?
For finished-model acceptance, measure them after the required washing, complete drying, UV post-curing and specified finishing sequence. If intermediate measurements are taken for process development, label them separately from final inspection results.
Does XY pixel size determine dental model accuracy or repeatability?
No. XY pixel size describes nominal sampling in the exposure plane. Finished-model results also depend on optics, mechanics, calibration, resin response, exposure, geometry, orientation, supports, platform condition, environment, post-processing and measurement.
Can a calibration cube prove production repeatability?
No. It can help isolate dimensional behavior and diagnose process changes, but production validation should include representative dental models containing the geometry and critical features used in the real laboratory workflow.
Evaluate the Accuracy Requirements Around Your Actual Dental Model
A useful equipment or workflow discussion begins with the model and acceptance requirement rather than a resolution label. For project evaluation, provide:
- CAD, STL or other representative model file
- Overall model dimensions
- Dental laboratory application
- Critical dimensions, landmarks and fit-related features
- Tolerance or fit requirements where defined
- Material requirements
- Expected quantity and build arrangement
- Surface and finishing requirements
- Post-processing conditions
- Planned dimensional or 3D inspection method
Submit the project information through YIDIMU's model and project evaluation page so the printer, resin, process and inspection requirements can be reviewed as one workflow.